

Build a course with sections and lessons in HumHub
A course is a set of sections, each holding lessons of four kinds. This page follows an instructor from the empty course to its publication.
1. Create the course
Open the Courses tab of the Space, then Instructor Dashboard and Create Course. The course settings come in three sub-tabs:
- Basic Info: the title, the description, the level (beginner, intermediate, advanced), the language, the status and Publish At.
- Details: the thumbnail (1280×720 pixels is the recommended size), What You Will Learn (one learning outcome per line) and the requirements, shown on the course page.
- Settings: the enrollment type and the maximum number of students (enrollment), the categories, the Prerequisites (courses a student must complete before starting this one; the course page then says which to finish first) and Allow students to comment on lessons: a discussion under every lesson. Turning it off hides the comments without deleting them.
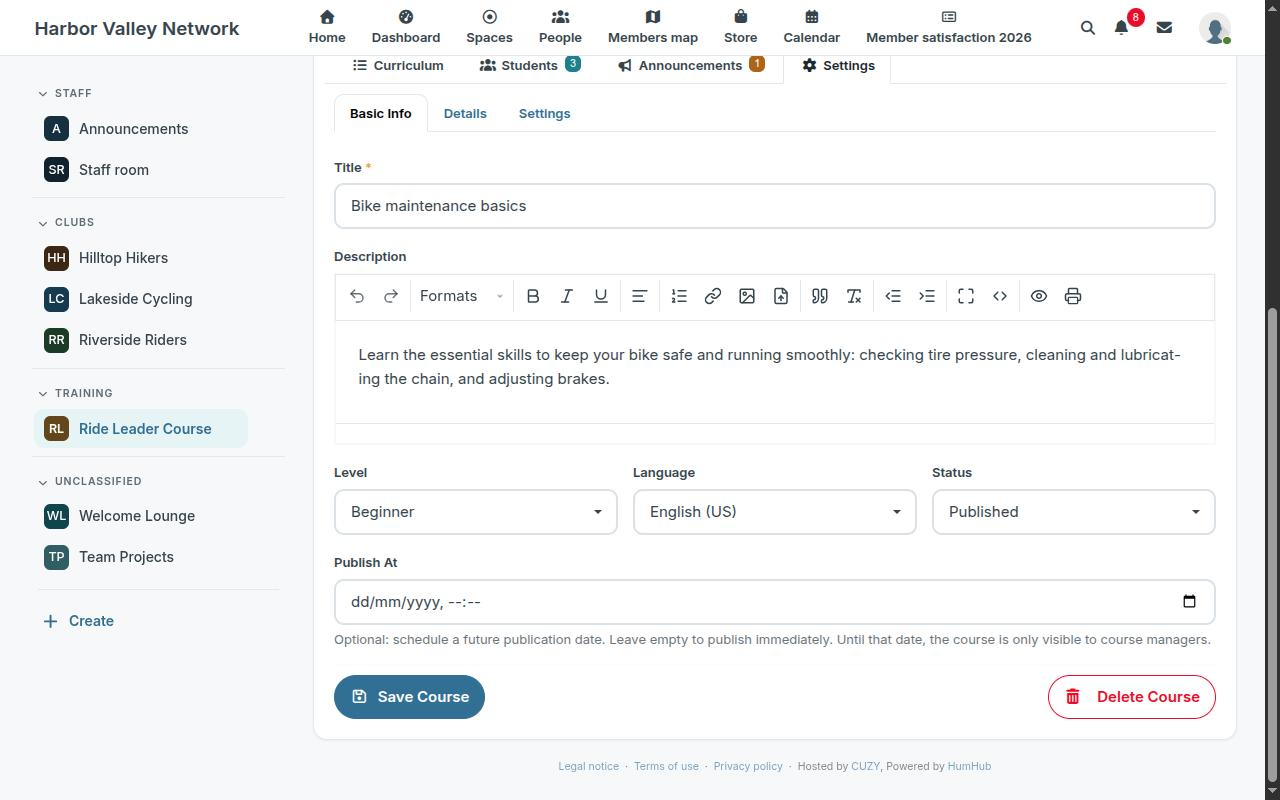
A new course is a draft: only instructors see it.
2. Add sections and lessons
The Curriculum tab of the course has two panels: the outline on the left, the editor of the selected lesson on the right. Add a section with New Section, then lessons inside it with New Lesson, choosing the lesson type:
| Type | What the student sees |
|---|---|
| Video | a YouTube or Vimeo video, or a video file, played in the page |
| Text | a page written in the editor, with images and media players |
| a PDF document shown in the page, which can be opened in a new tab | |
| Embed | any web page that allows embedding (a form, a slide deck, an interactive exercise), by its address |
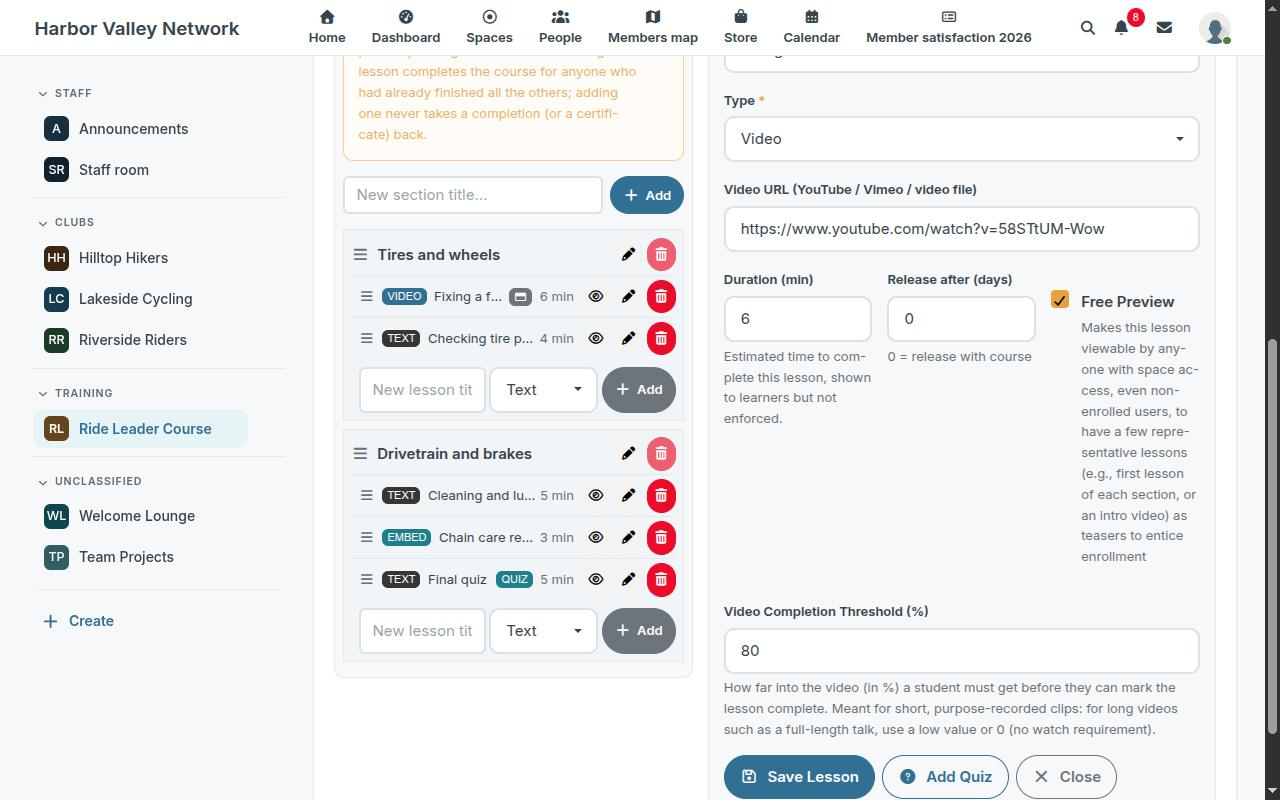
Sections and lessons are reordered by drag and drop in the outline. Add sample lessons fills an empty course with an example section, lessons and a short quiz: a quick way to see how a course looks to a student. They are ordinary lessons, to edit or delete.
3. Lesson options
In the lesson editor:
- Duration (min): the estimated time, shown to students and not enforced.
- Release after (days): drip content. The lesson unlocks this many days after the student's enrollment, and the player says on which date. 0 makes it available at once.
- Free Preview: anyone who can see the Space can open this lesson without enrolling. Use it for the first lesson or an introduction video.
- Video Completion Threshold (%): for video lessons, how much of the video a student must watch before Mark Complete is available. Keep it for short clips made for the course; for a long talk, use a low value or 0.
- Add Quiz: see quizzes.
4. Publish
Publish at the top of the course page makes the course visible in the catalog. A course needs at least one lesson to be published. Publish At, in Basic Info, schedules the publication instead: until that date, only instructors see the course.
Once students are enrolled, the Curriculum tab warns that changes apply at once to students part-way through. Adding a lesson never takes a completion or a certificate back; removing the last lesson a student had not finished completes the course for them.
Preview as student shows the course as a member sees it. Duplicate (in the Instructor Dashboard) copies a course with its curriculum and quizzes, without its students, as a new draft. Unpublish hides a course again; archiving keeps it out of the catalog with its students' records.
Read next
- Set up the LMS module in a HumHub Space
- Enroll students in HumHub courses: open, invite, approve
- Add a quiz to a HumHub course lesson
- Course completion certificates in HumHub
- Track course progress and students in HumHub
- LMS — Learning Management System module: features and price
- New versions of the modules by email: the CUZY newsletter, a few times a year